Capture the ethereal magic of the Aurora Borealis with these expert photography tips tailored for the pristine skies of the Northwest Territories. Learn how to master your camera settings and prepare for the Arctic cold.
Chasing the Celestial Dance
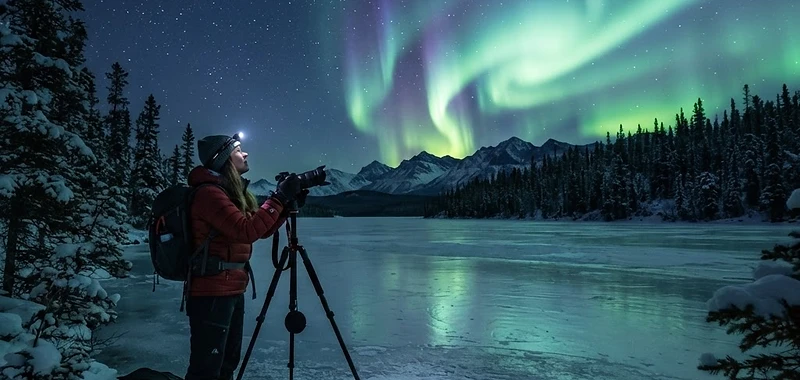
The sky over Yellowknife doesn’t just sparkle; it ignites with ribbons of neon green, violet, and crimson that defy description. Mastering Northern Lights photography requires more than just a sturdy tripod—it demands a deep understanding of patience, extreme cold-weather logistics, and the right technical approach to capture the aurora as it dances across the sub-arctic horizon.
Essential Camera Gear for the Cold
When temperatures plummet to -30°C in the Northwest Territories, your gear will fail long before you do if you aren't prepared. Your battery life will drop by up to 50% in the cold, so carry at least three extra batteries tucked close to your body in a warm pocket.
- Camera Body: Full-frame DSLRs or mirrorless cameras with excellent high-ISO performance are essential.
- Lens: Wide-angle lenses (14mm to 24mm) with a fast aperture of f/2.8 or lower are non-negotiable.
- Tripod: A heavy-duty, carbon fiber tripod is necessary to prevent vibration from the relentless Arctic wind.
Need a base for your gear? 🏨 Find hotels and places to stay in Yellowknife to keep your equipment warm between shoots.
Mastering Technical Settings
Forget auto-mode; the secret to capturing the aurora lies in manual control. You need to gather as much light as possible without introducing excessive digital noise.
- Aperture: Set your lens to its widest setting (lowest f-number).
- ISO: Start at 1600 or 3200. Adjust based on how bright the lights are—lower for intense activity, higher for faint glows.
- Shutter Speed: Use a 5 to 15-second exposure. If the lights are moving fast, use a shorter shutter speed to keep the details sharp rather than blurry.
If you are flying into YZF, you will need reliable transportation to reach the dark, clear viewing spots away from city light pollution. 🚗 Compare rental cars for your Northwest Territories trip to ensure you can reach the prime photography locations on your own schedule.
Composition and Foreground Elements
The most compelling aurora photos include more than just the sky; they tell a story by incorporating the rugged Northern landscape. Look for silhouette opportunities like GNWT cabin structures, frozen lake surfaces, or the gnarled spruce trees that define the Taiga Shield.
Try framing your shot with a foreground element to provide scale. A photo of a lone, frosted tree against a swirling sky is far more powerful than a shot of just stars and light. If you are new to the area, 🎟️ Browse tours and activities in Yellowknife to join experienced guides who know exactly where the most photogenic landscape features are located.
Staying Safe in the North
Photography is secondary to your survival. Frostbite can occur in minutes when you are standing still, fiddling with camera dials. Wear triple-layer clothing, including moisture-wicking base layers and a high-quality down parka rated for -40°C. Never head out into the remote wilderness alone without informing someone of your coordinates, especially if you are heading out to the Ingraham Trail.
Start Planning Your Trip
- 🏨 Find hotels and places to stay in Yellowknife
- 🚗 Compare rental cars for your Northwest Territories trip
- 🎟️ Browse tours and activities in Yellowknife
- Read more about our recommended winter gear in our Canada-wide packing guide
Ready to explore Canada's most popular destination?
Turquoise lakes, soaring peaks, and the Rockies' most iconic sights await in Banff, Alberta — our most-read destination guide.
Explore the Banff Destination Guide